
The best science classroom decorating ideas do more than make a room look bright. A science room is a working space: pupils handle equipment, read displays, argue about results and breathe the same air for an hour at a time. So every poster, plant and shelf is worth judging on one question: does it help someone learn science, or does it just fill a wall?
This guide combines two things people search for together. The first is how to decorate a science classroom with posters, models and displays. The second is how to set one up properly, with sensible zones, labelled equipment, safe routines and a culture of curiosity. Along the way we check the claims against research, because some popular advice (for example, that more colour always helps) turns out to be more complicated.
Start with the purpose, not the poster
A classroom wall is valuable space, and the research on it is more interesting than most decorating lists admit. In a well-known 2014 experiment in Psychological Science, Anna Fisher and colleagues taught kindergarten children six short science lessons, three in a heavily decorated room and three in a sparse one. The children scored 55% correct after the sparse-room lessons and 42% after the decorated-room lessons, and they spent more time off task in the decorated room (38.6% against 28.4%).
Use the calculator below to see how big that gap is. The two scores differ by 13 percentage points, but as a percentage change the sparse-room result is about 31% higher.
Be careful with what this does and does not show. The children were five-year-olds in a laboratory room, not a secondary lab, and the authors themselves said more research is needed in real classrooms. The sensible reading is not “never decorate”. It is “decorate with a reason, and leave some wall bare”.
Larger studies of classroom design point the same way. Peter Barrett and colleagues measured 153 classrooms in 27 primary schools and followed 3,766 pupils. They found that seven design features together explained 16% of the variation in pupils’ academic progress. That is not a 16% gain in marks. It is a share of the differences between pupils that could be linked to the room, and it is a reminder that the room matters but is only one factor among many. Their framework included naturalness (light, air, temperature) and stimulation, where a moderate level worked better than too little or too much.
Four ideas for the main science walls
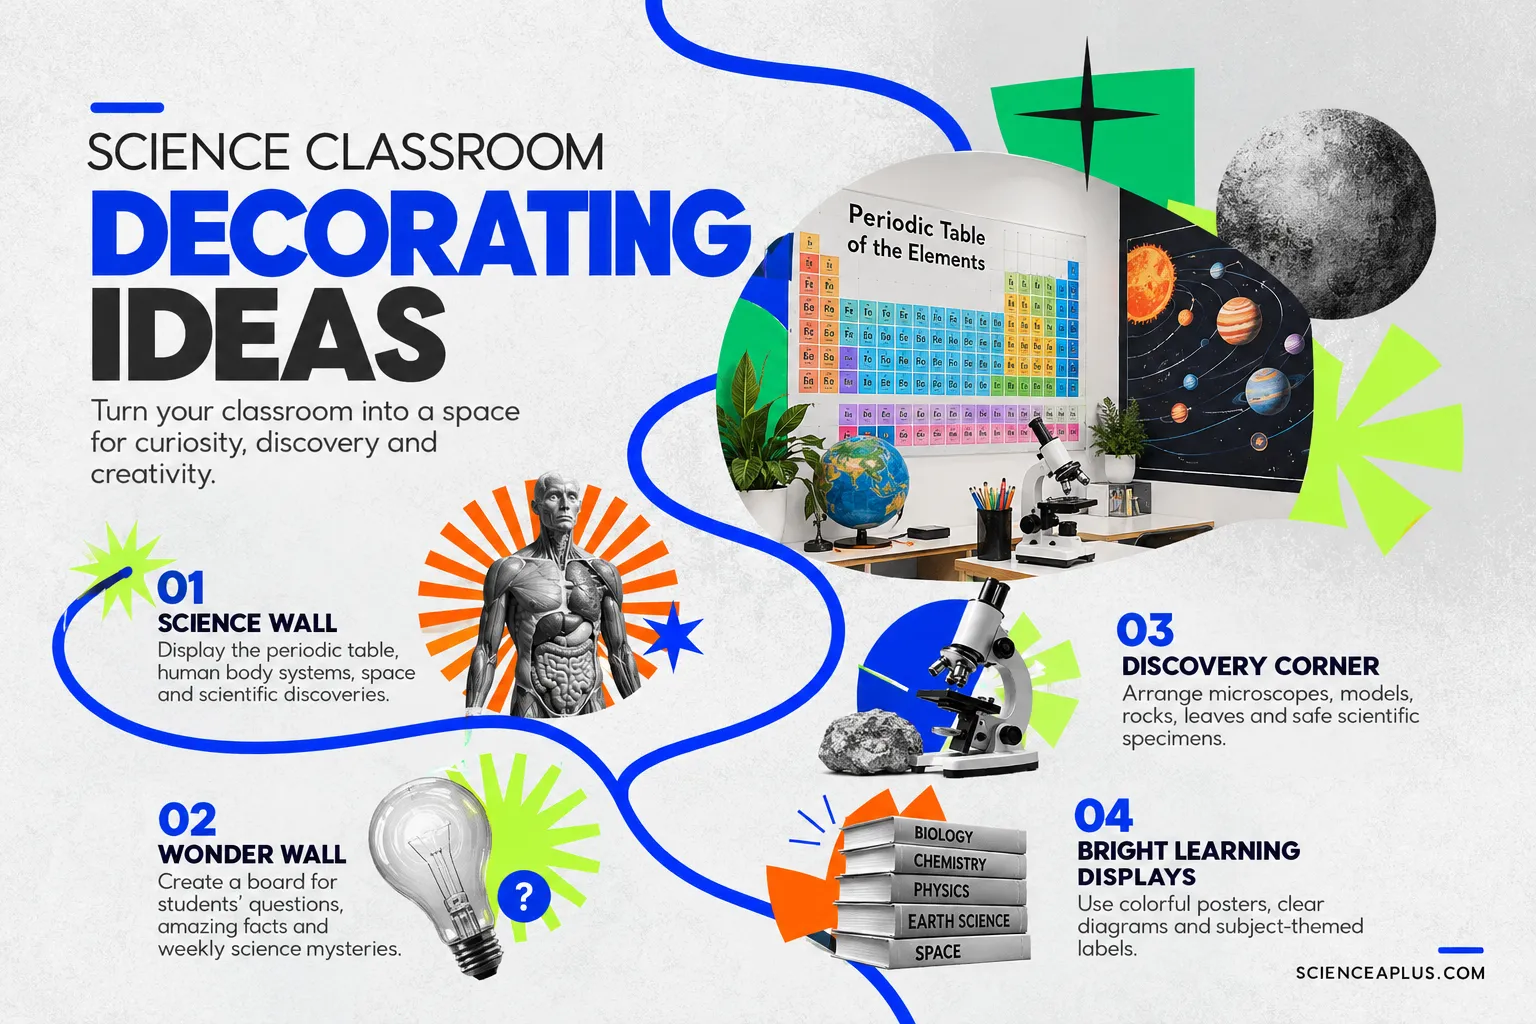
The first slide above sets out four ideas that work well together: a science wall, a wonder wall, a discovery corner and bright learning displays. Here is how to make each one earn its place.
1. A science wall that pupils actually use
A big periodic table is the classic centrepiece. There are 118 confirmed elements, and a table that is large enough to read from the back of the room turns into a daily reference. Turn it into a game by pointing to an element and asking for its symbol, group or one property, then link it to a deeper look at the patterns seen in the periodic table. Next to it, a labelled diagram of the human body systems and a wall chart of the planets cover biology, chemistry and physics in one glance.
2. A wonder wall for questions
A board where pupils pin their own questions, surprising facts and a weekly mystery costs almost nothing. It signals that questions are welcome and gives you real starting points for lessons.
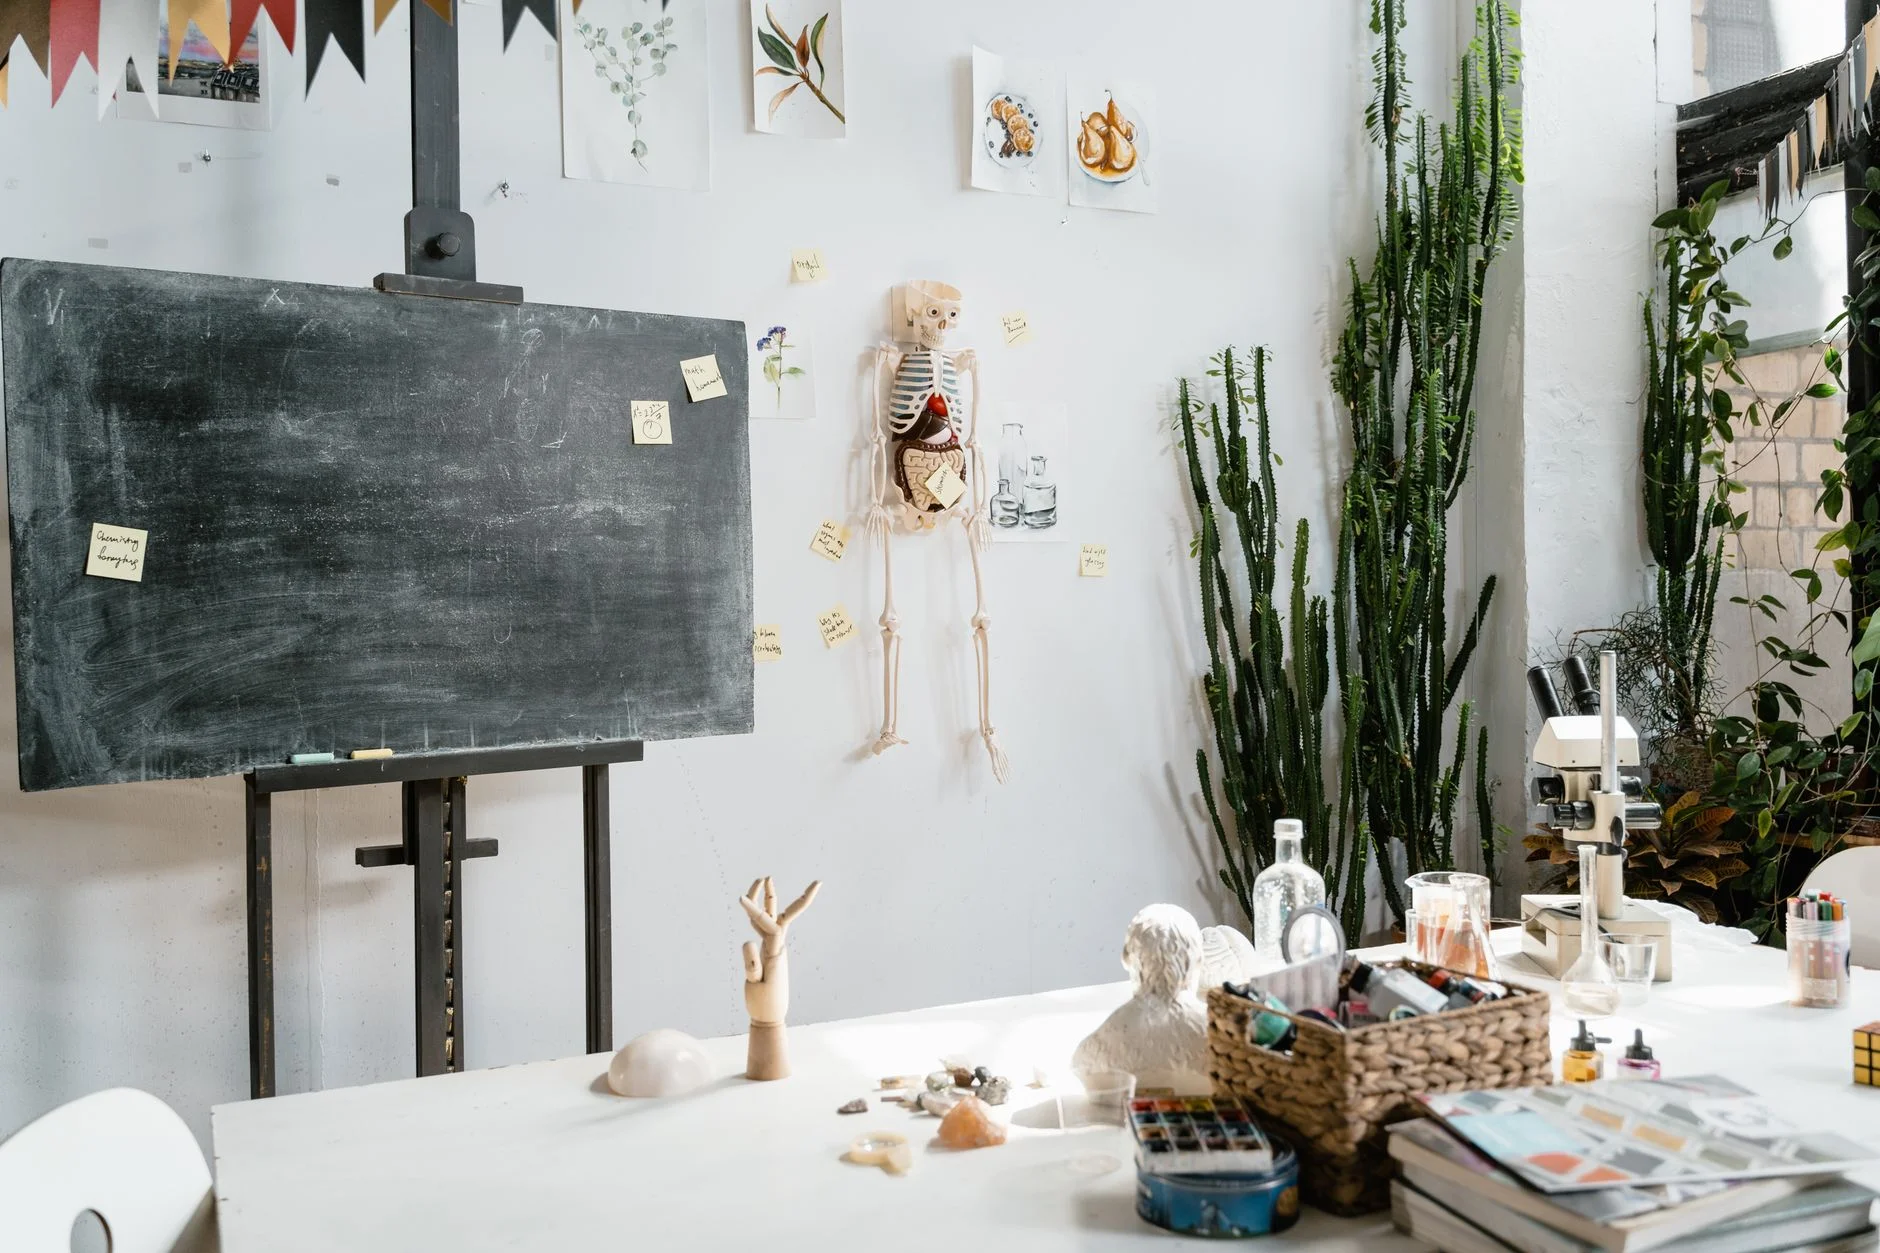
3. A discovery corner
Microscopes, rocks, leaves, bones and models can sit on a table or shelf for pupils to examine before a lesson or when they finish early. Keep specimens robust, set handling rules first, and risk-assess anything alive.
4. Bright learning displays
Colourful posters, clear diagrams and subject-themed labels help pupils find their way around the sciences. Clear beats cluttered, and a display should come down when its topic ends.
Four more ideas: STEM, achievement, eco and safety
The second slide adds four more ideas: a STEM challenge zone, a student achievement wall, an eco-friendly corner and a safety first display.
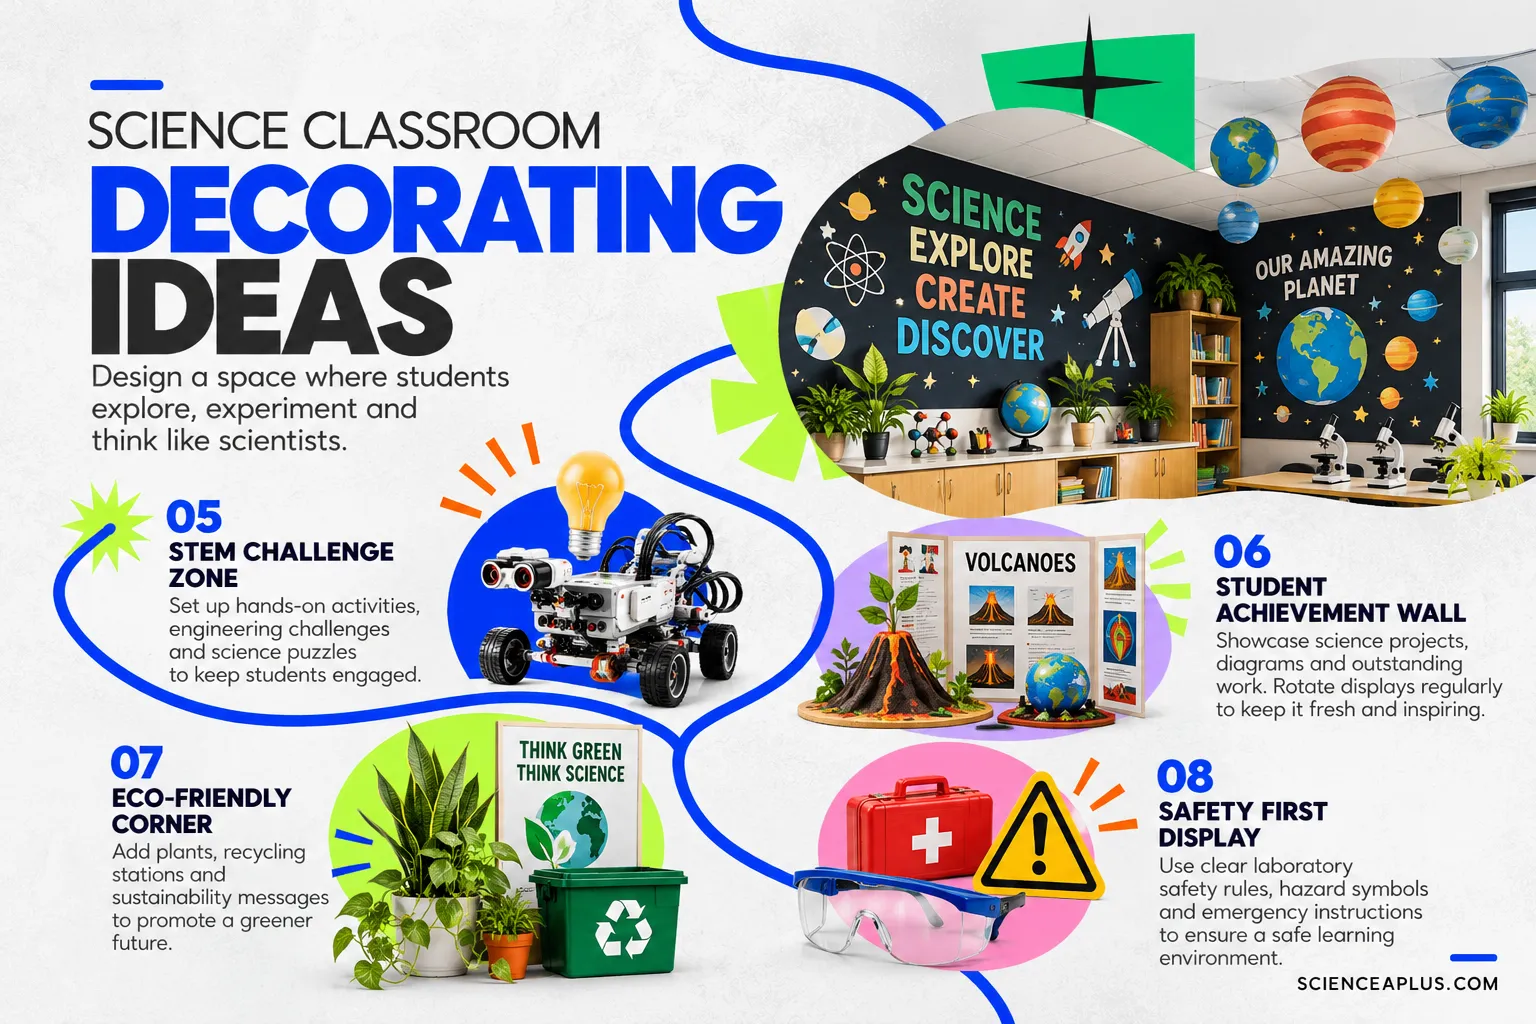
A STEM challenge zone holds hands-on puzzles, circuit kits or engineering challenges for pupils who finish early. A student achievement wall shows project work, diagrams and excellent homework. The slide suggests rotating displays regularly, which is a good habit: it keeps the wall fresh and gives more pupils a turn. Reward clear method, not just neat handwriting.
An eco-friendly corner with plants and a recycling station promotes a greener mindset. Plants are pleasant, but the evidence that a few potted plants noticeably purify room air is weak.
The safety first display uses clear laboratory rules, hazard symbols and emergency instructions. That one is not decoration at all. It is part of the room’s working equipment, and the safety section later in this guide explains how to build it properly.
Models and interactive displays
Three-dimensional models give pupils something to point at and argue about. A hanging solar system model, with each planet as a painted polystyrene ball or balloon, is a favourite, but it is almost never to scale. Try this: the Sun’s diameter is about 109 times Earth’s. If Earth is a 2 cm ball, how wide would a model Sun need to be?
How wide would the model Sun be if Earth is 2 cm across? (2 marks)
2 cm × 109 = 218 cm, or about 2.2 m. That is wider than most classroom doors, which is why wall models show the planets in order but rarely to scale. Saying so on the display is good science.
Interactive displays work in the same way. A volcano model that erupts, or a magnet table where pupils can see field patterns, invites prediction and discussion. Add a card asking “What do you think will happen, and why?” Fix anything hanging from the ceiling securely, away from exits and lights, and check the fixings each term.
Science classroom setup: zones, storage and equipment
Decoration is the finishing touch. The layout comes first. A good science classroom setup makes it obvious where to do theory, where to do practical work, where to talk in groups and where to look at displays. The first slide in the setup series suggests organising the room into clear learning zones, and it is worth taking literally.
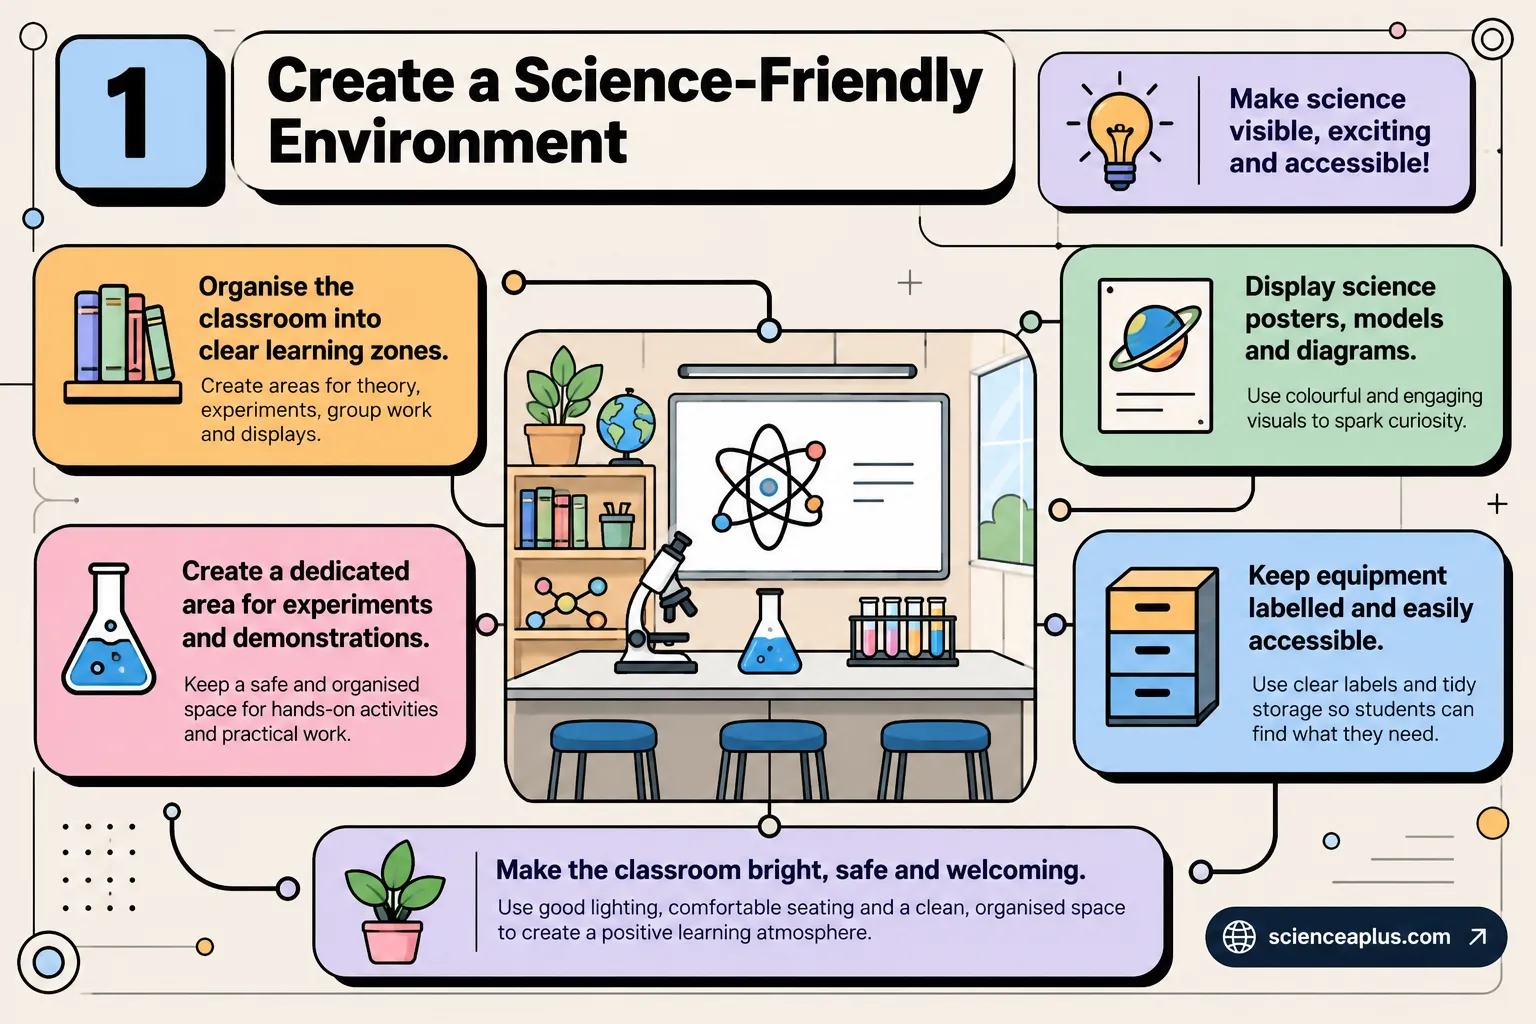
- A theory zone with a clear view of the board, where pupils can write without equipment on their desks.
- A practical zone with benches, sinks and enough space between pupils to move safely. Keep bags and coats away from this area so they are not tripped over.
- A group-work zone where tables can be pushed together for discussion or a STEM challenge.
- A display zone for the wall displays described above, placed where pupils will naturally look.
Keep equipment labelled and easy to reach, as the slide says. Labelled trays for beakers, thermometers or lenses mean pupils spend their time investigating, not hunting. A picture on each tray also shows at once when something is missing.
Make the room feel like a lab
A bench with a microscope, a shelf of models and a little student artwork make the room feel owned by the class. Be careful with famous science quotations: many online are misattributed, so check the source, or describe what scientists such as Marie Curie actually did.
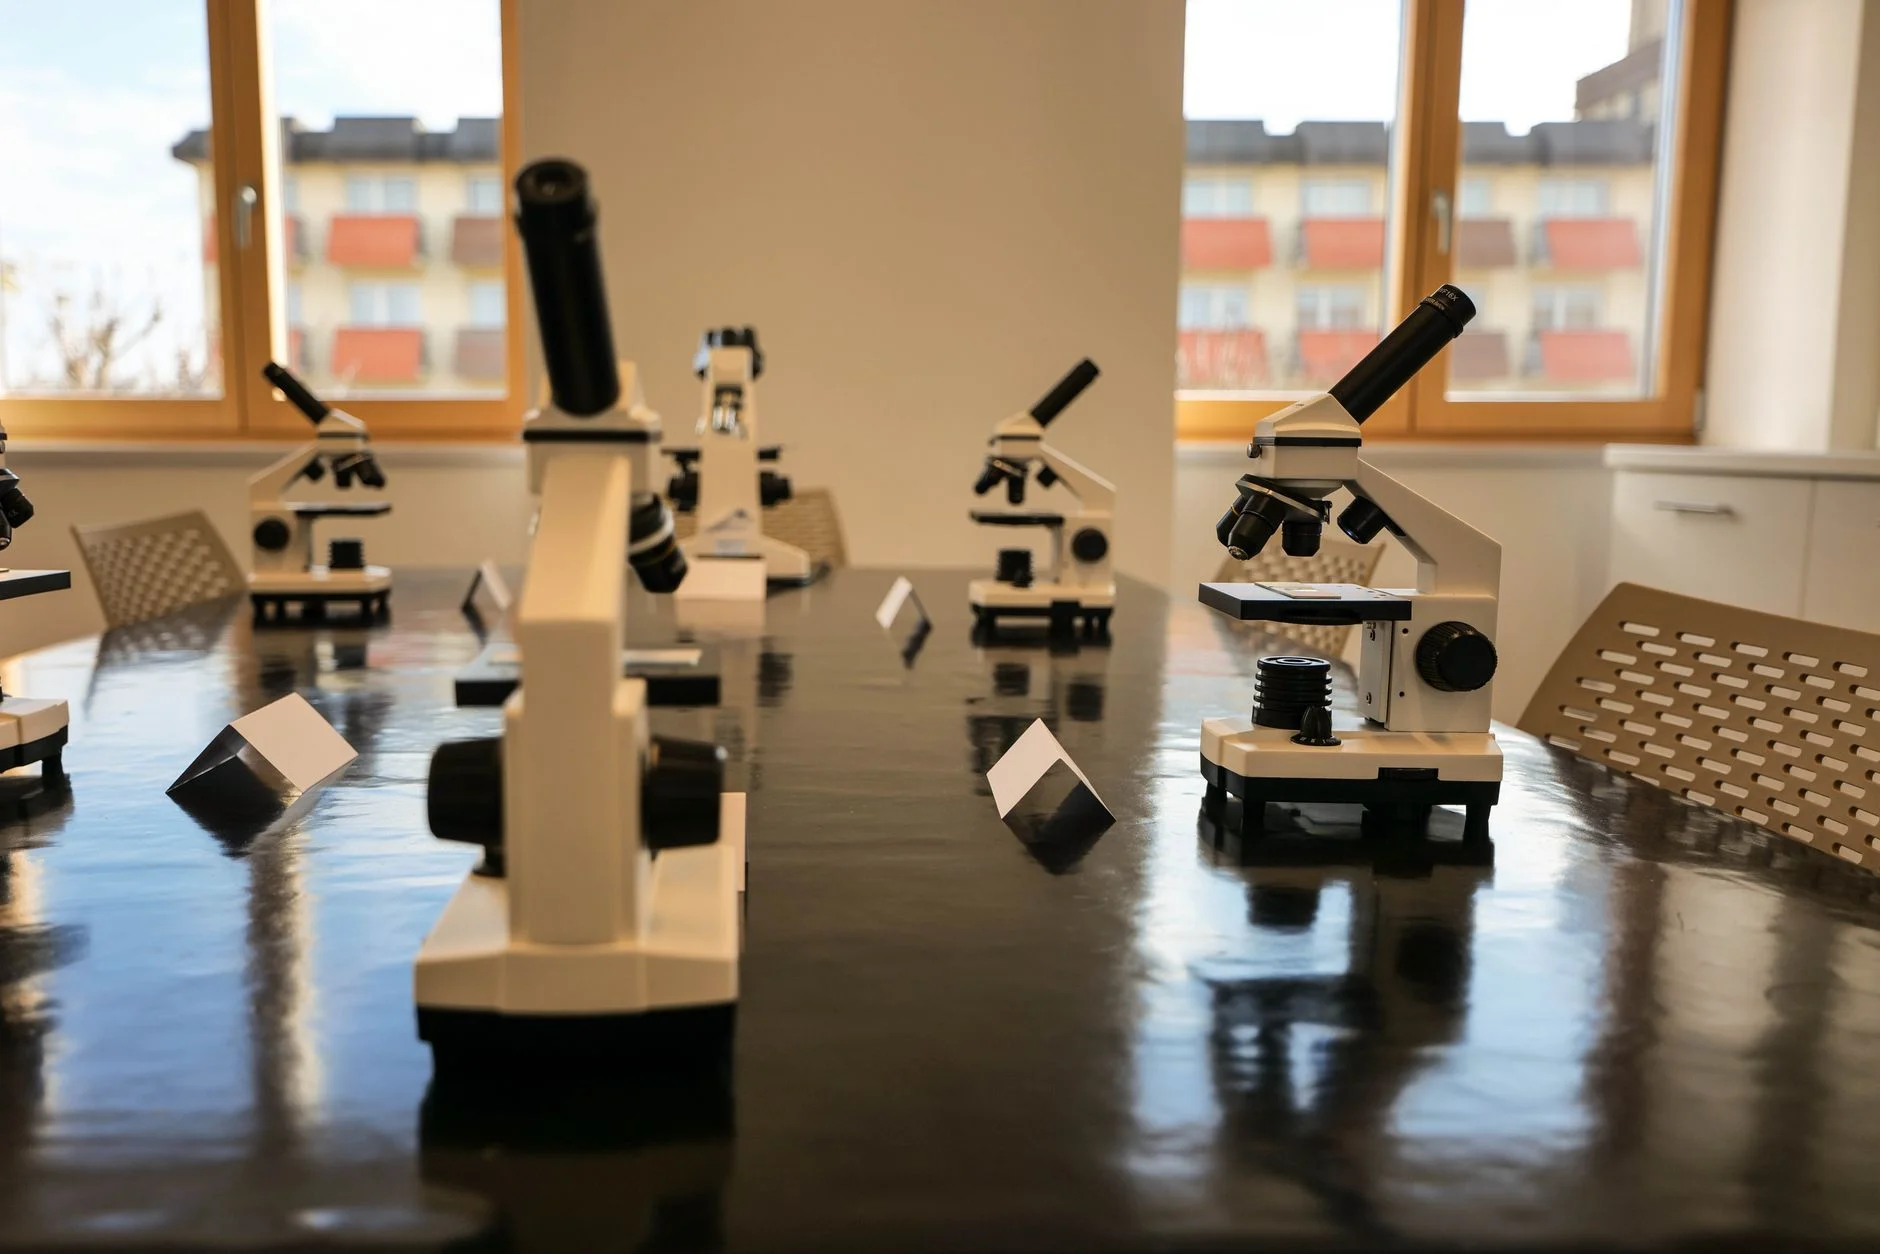
Science lab equipment and what it is for
Displaying real equipment is more than decoration. Pupils learn the names and the purpose of each tool, which supports exam questions on method and apparatus. Teach the purpose, not just the name. The table below links common items to their job. Our longer guides to common lab equipment and biology lab equipment give more detail.
| Equipment | What it is used for | Safe-handling point |
|---|---|---|
| Beaker | Holding and heating liquids; volumes are only approximate | Do not fill more than about two-thirds full when heating |
| Measuring cylinder | Measuring liquid volumes more accurately than a beaker | Read at eye level, from the bottom of the meniscus |
| Pipette | Transferring small, measured amounts of liquid | Never suck liquid up by mouth |
| Microscope | Magnifying cells and tiny structures | Carry with two hands; start on the lowest power |
| Bunsen burner | Heating | Tie back hair, wear eye protection, set to a safety flame when not in use |
Build a safe science classroom
Safety has to be designed into the room, not added at the end. In England, the advisory service CLEAPSS supports practical science, design and technology, and art in schools and colleges, and it says that approximately 95% of primary and secondary schools in England, Wales and Northern Ireland are members. Your employer and your own school’s policy decide the exact rules, so treat this section as a general checklist and always follow your school’s own risk assessments.
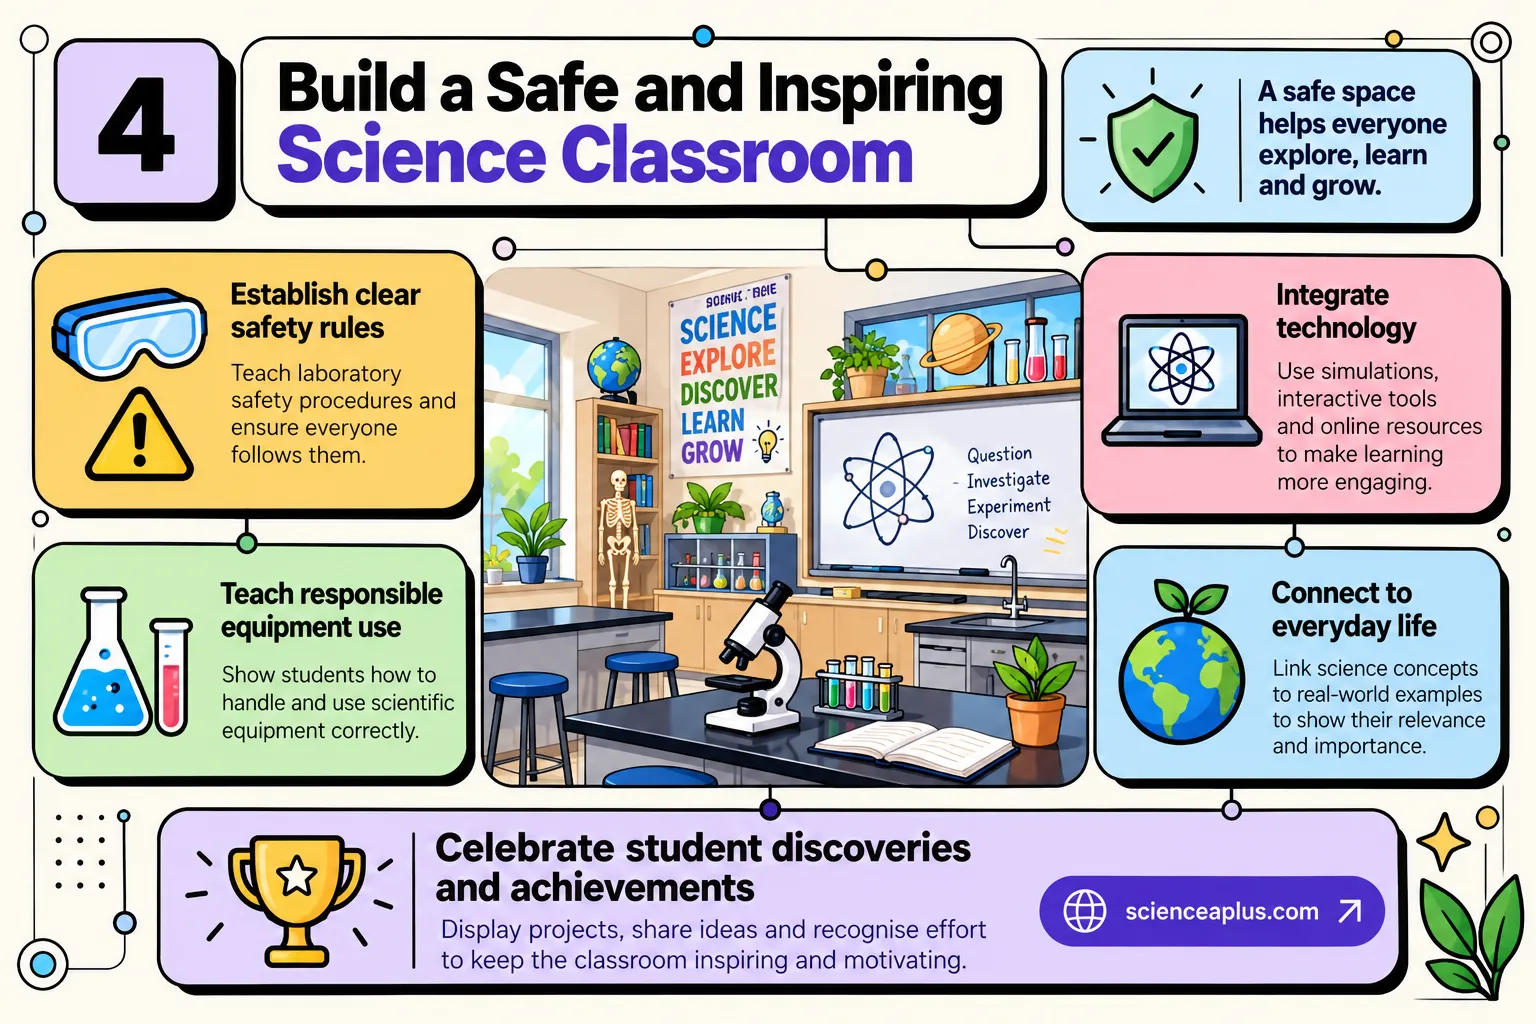
The safe classroom slide gives five headline ideas.
Establish clear safety rules
Teach laboratory procedures at the start of the year, and revisit them before every new type of practical. Typical rules include: wear eye protection when told to, tie back long hair, keep bags and stools tucked away, do not eat or drink in the laboratory, never taste chemicals, report spills and breakages at once, and wash hands at the end. Put the key rules on the wall in short, plain sentences, next to hazard symbols and the route to the nearest exit and the first-aid kit.
Teach responsible equipment use
Show pupils how to carry a microscope, light a Bunsen burner, read a measuring cylinder and clear away. A short demonstration beats a long list of rules. Pupils copy what they see, so every demonstration should model the habits you want, including eye protection.
Technology, everyday links and celebration
Use simulations to extend practical work, not replace it; link each topic to something pupils meet outside school; and recognise good method, not only right answers.
A quick room-check you can tick off
- Safety rules, hazard symbols and exit route are on the wall
- Eye protection is stored where everyone can reach it
- Equipment trays are labelled with names and pictures
- Aisles are clear and bags are away from the practical zone
- One wall is left calm and uncluttered
- Ceiling models and displays are fixed securely
- The room can be ventilated by opening windows or doors
- A first-aid kit and eyewash are in a known place (check your school’s requirement)
Practical work: what the evidence says
A science classroom is built for practical work in science, so it is fair to ask what the research says about it. The Education Endowment Foundation (EEF) guidance report Improving Secondary Science sets out seven recommendations. One is to use practical work purposefully and as part of a learning sequence. Its summary says practical work engages pupils, so teachers should be clear why they have chosen a particular activity, and that it can build specific practical skills and scientific reasoning. The report also notes that open-ended research projects can have positive effects.
Ofsted’s science research review, published in April 2021, makes a similar point. It separates substantive knowledge (the facts, models and theories of science) from disciplinary knowledge (how scientists work, including enquiry types such as pattern seeking, and ideas like evidence and accuracy). Its key messages were that practical work should have a clear purpose, form part of a wider teaching sequence, and happen when pupils have enough prior knowledge to learn from it. Ofsted’s 2023 follow-up report found large differences in how much practical work schools did, with secondary pupils getting less hands-on work than primary pupils.
The Gatsby Foundation’s 2017 report Good Practical Science proposed ten benchmarks, including planned, purposeful and frequent practical work, good facilities and technical support. In a survey of about 400 secondary schools, only about 6% met five or more of them.
What does this mean for the room? Practical work is not automatically good. A “follow the recipe” practical in which pupils do not know why they are doing it can leave them remembering the colour change but not the chemistry. A good practical has a question, a prediction, a method, data and a conclusion.
Make learning hands-on
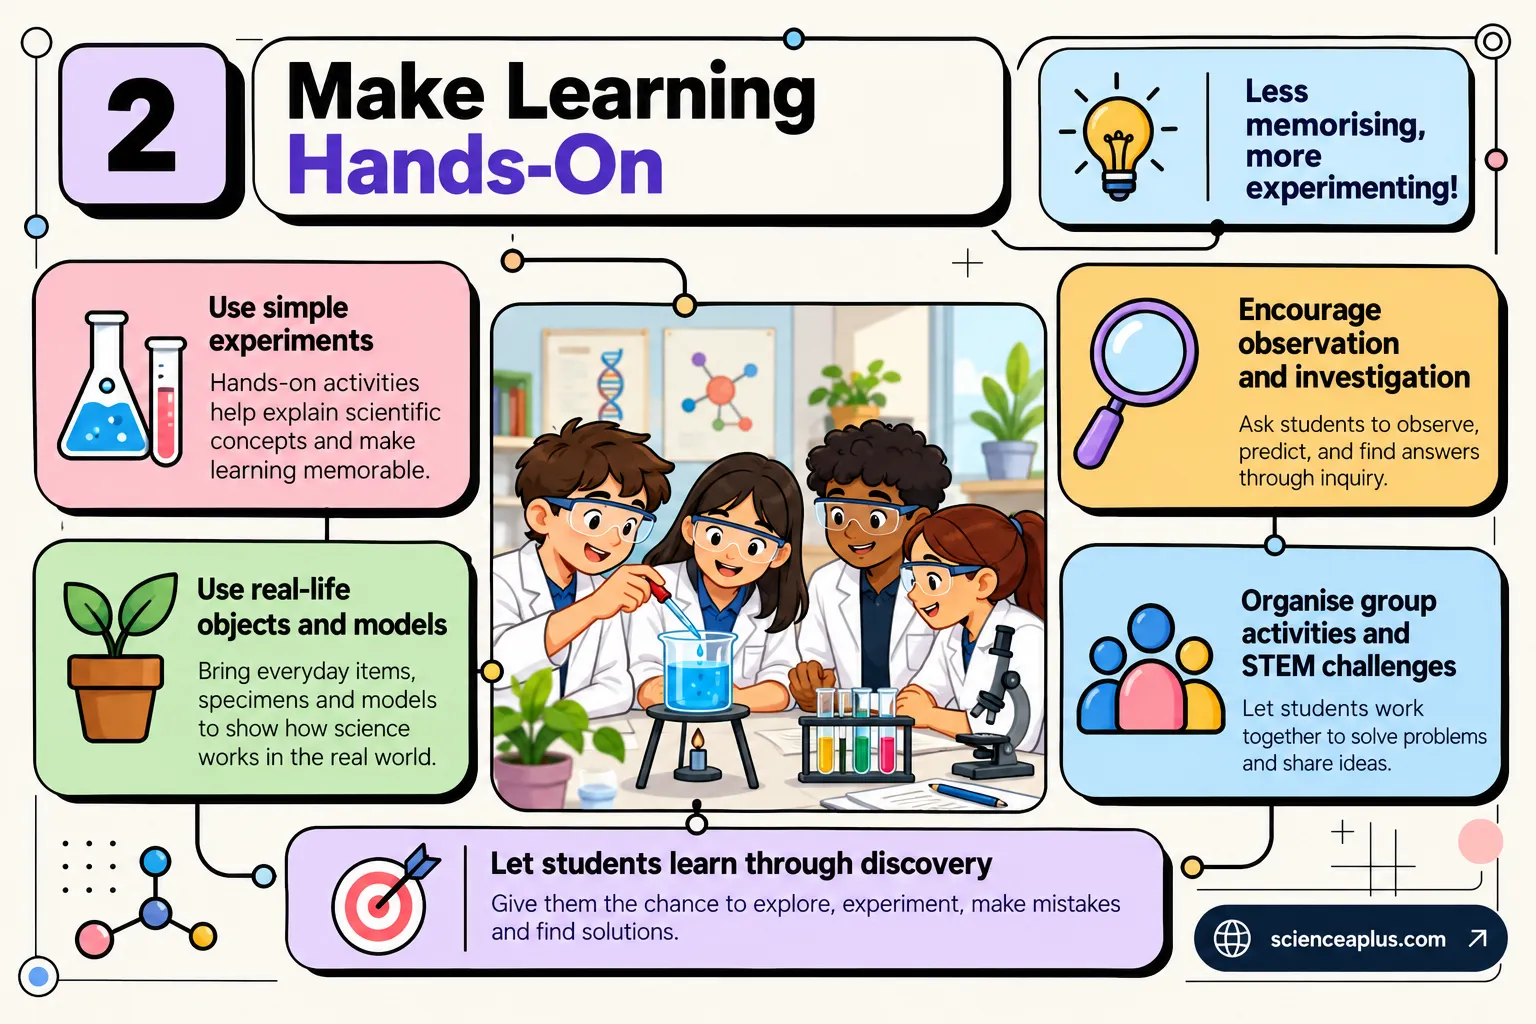
The “Make Learning Hands-On” slide says: less memorising, more experimenting. Four of its five suggestions are worth turning into habits.
- Use simple experiments. Simple equipment is often best, because pupils can focus on the idea instead of the kit. Our guide to how to use the scientific method gives lots of easy starting points.
- Encourage observation and investigation. Ask pupils to observe, predict and then find out.
- Organise group activities and STEM challenges. Give each pupil a role, such as equipment manager or recorder, so that everyone is involved.
- Let students learn through discovery. Give them time to explore, make mistakes and find solutions, but do not leave them alone with a task that has no structure. Give guidance and a clear question, so that discovery has a direction.
The scientific method on your wall
One of the most useful displays in a science room is the scientific method, shown not as a rigid ladder but as a cycle. A typical version runs like this:
- Observe something and ask a question.
- Research what is already known.
- Make a hypothesis: a testable explanation.
- Make a prediction about what you expect to measure.
- Plan and carry out a fair test, changing only the independent variable, measuring the dependent variable and keeping control variables the same.
- Analyse the data and look for patterns and anomalies.
- Draw a conclusion and evaluate the method.
- Communicate the results so others can check them.
Real science is messier. Ofsted’s review notes that scientists use several types of enquiry, including pattern seeking and observation over time, not only the controlled experiment. A wall display can show this by adding “Do we need to repeat it?” and “What could be wrong?” loops. For a deeper walk-through, see the scientific method made easy.
The calculator shows why repeats matter: enter repeat readings, such as trolley times, and change one value to see an anomaly flagged.
Encourage curiosity and collaboration
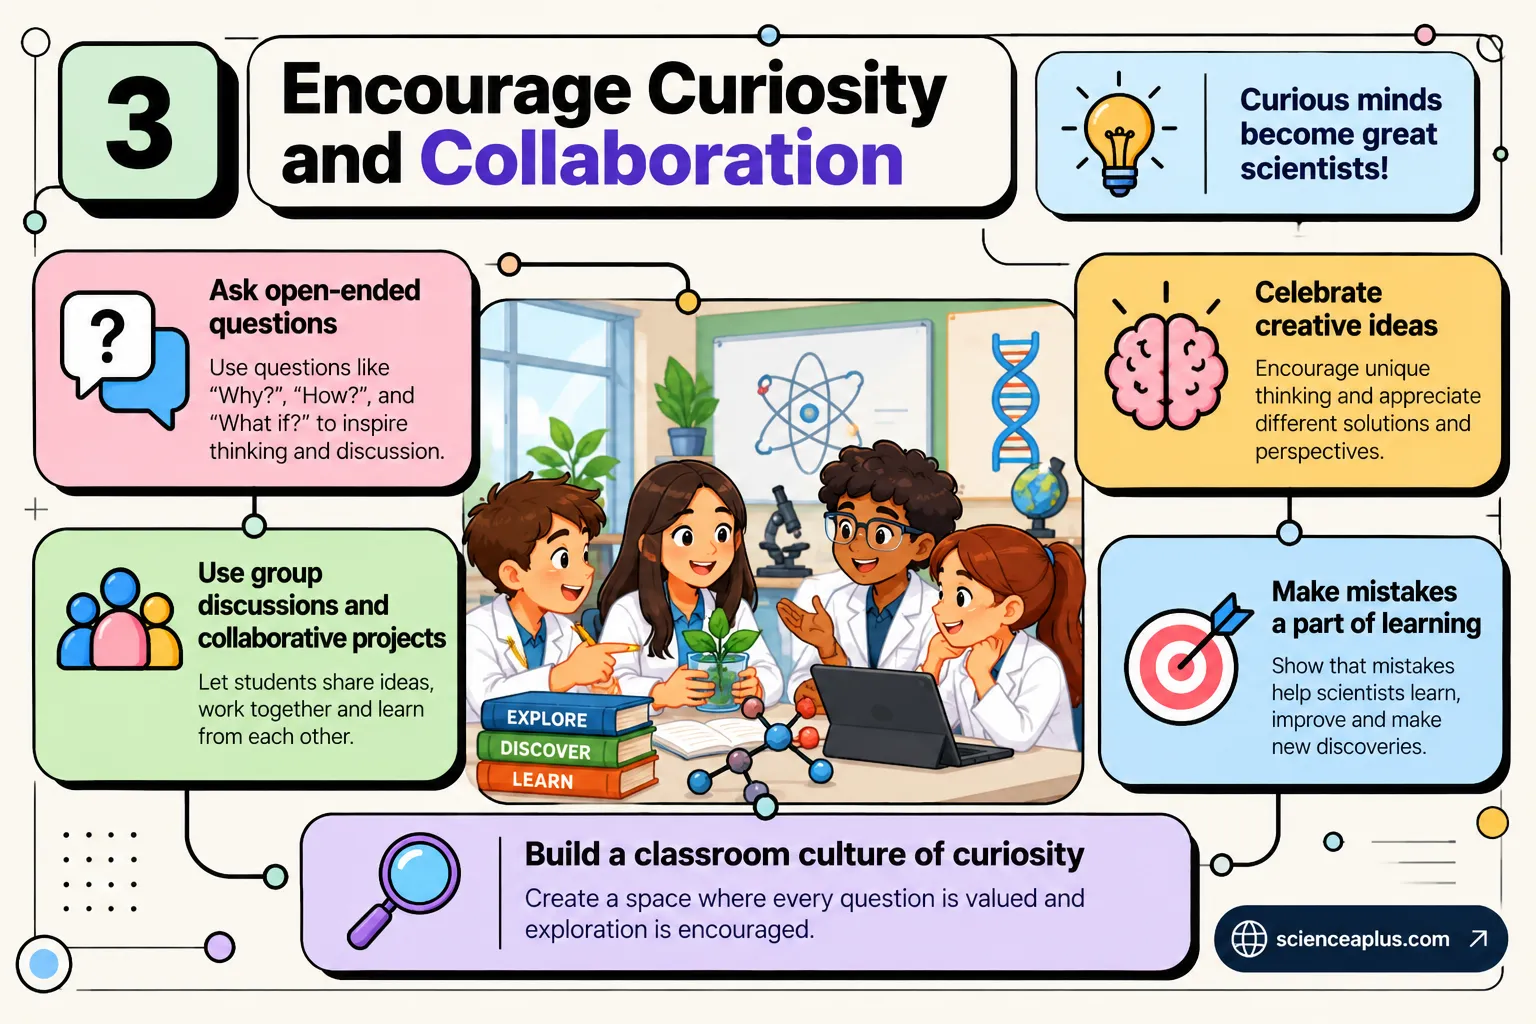
The third slide in the series is about classroom culture, and it may be the most important idea in this guide. A room full of beautiful displays will not help much if pupils are afraid to ask questions or to be wrong.
Ask open-ended questions
Questions such as “Why?”, “How do you know?” and “What if we changed…?” invite explanation. Closed questions (“What is the symbol for sodium?”) are useful for checking recall, but they should not be the only kind. Leave a few seconds of silence after asking. Pupils often need that time to think.
Use group discussion and collaborative projects
Discussion lets pupils test their ideas against other people’s. Give groups a specific task and a role for each member, and ask for a result you can check. Talk is also one of the best ways to find a pupil’s misconceptions, which the EEF report also highlights as something to build into teaching.
Celebrate creative ideas, and make mistakes part of learning
Scientists are wrong often, and that is how knowledge moves forward. Show pupils a result that did not match a prediction and ask what it tells us. Pupils who prefer learning by doing may enjoy our study tips for kinesthetic learners.
A pupil’s experiment gives a result that disagrees with the prediction. Give two useful things a teacher can say. (2 marks)
Examples: “What might explain the difference?” (prompting evaluation of the method and the idea) and “How could we test that?” (turning the surprise into the next investigation). Both treat the result as evidence, not as failure.
The science behind it: air, light, noise and temperature
The physical environment of a classroom is itself a science topic. Here is what is known, and where the evidence is mixed.
Air and carbon dioxide
We breathe out carbon dioxide (CO₂). Outdoor air currently contains about 430 parts per million (ppm): NOAA’s Mauna Loa record gave a monthly mean of 431.43 ppm for June 2026. Exhaled breath contains roughly 4% CO₂, which is about 40,000 ppm. In a room with 30 people and too little fresh air, the CO₂ level climbs steadily through the lesson.
A classroom CO₂ monitor is therefore a measure of how well the room is ventilated, not a pollution alarm in itself. At the levels found in classrooms, CO₂ is a marker: where it is high, other things that people breathe out are building up too. Department for Education guidance says that where readings are consistently above 1,500 ppm in an occupied room, schools should act to improve ventilation. The Building Bulletin 101 standard for new and refurbished schools in England sets a daily average of no more than 1,500 ppm for naturally ventilated rooms and 1,000 ppm for mechanically ventilated ones, with peaks above those averages limited to no more than 20 consecutive minutes a day (up to 2,000 ppm for natural ventilation and 1,500 ppm for mechanical ventilation).
Does stuffy air affect learning? A 2020 review by Pawel Wargocki and colleagues in Building and Environment modelled how classroom CO₂ relates to the speed and accuracy of schoolwork, learning-test results and attendance, and predicted gains from lower CO₂ and better ventilation. Treat this as suggestive rather than proven, because the studies differ in many other ways. The practical advice is simple: open windows and doors, especially between lessons.
Temperature
Many studies suggest that people work best in moderate temperatures, with 20–23 °C often quoted, but there is no single magic number. Comfort depends on clothes, activity, humidity and the weather outside, which is why BB101 uses an adaptive comfort approach rather than one fixed temperature.
Light and colour
Daylight and glare control help pupils read boards and apparatus. Online advice often recommends “full-spectrum” bulbs or blue and green walls, but we did not find strong evidence for either, so get the basics right first.
Noise
Background noise makes it harder to hear a teacher and to follow instructions. The Department for Education publishes acoustic standards for school buildings in Building Bulletin 93. In a lab, hard surfaces and running taps make noise worse, so soft furnishings and a calm start to practical lessons all matter.
Maths practice from the classroom
Convert 1,500 ppm into a percentage. (1 mark)
1 ppm is one part in a million, so 1,500 ppm = 1,500 ÷ 1,000,000 = 0.0015 = 0.15%.
How many times higher is a 1,500 ppm classroom than outdoor air at about 431 ppm? (2 marks)
1,500 ÷ 431 ≈ 3.5, so the classroom reading is about three and a half times the outdoor level.
A lab measures 9 m × 7 m × 3 m and holds 30 pupils. How much air space is there per pupil? (3 marks)
Volume = 9 × 7 × 3 = 189 m³. Per pupil: 189 ÷ 30 = 6.3 m³.
Frequently asked questions about science classroom decorating ideas
What are good science classroom decorating ideas?
Good ideas include a science wall with the periodic table, a wonder wall for pupils’ questions, a discovery corner with microscopes and specimens, a STEM challenge zone, a student achievement wall and a safety display. Keep some wall space calm.
How do you set up a science classroom?
Divide the room into zones for theory, practical work, group work and displays. Label equipment and keep it easy to reach, keep aisles clear, put safety rules and the exit route on the wall, and make sure the room can be ventilated.
Does classroom decoration affect learning?
It can. A 2014 experiment with kindergarteners found higher test scores (55% against 42%) and less off-task time after lessons in a sparse room than in a heavily decorated one. The children were very young, so more research is needed in real classrooms.
What safety rules should a science lab have?
Typical rules are to wear eye protection when told, tie back long hair, keep bags away from walkways, never eat, drink or taste chemicals, report spills and breakages, and wash hands afterwards. Your school’s own policy and risk assessments, often informed by CLEAPSS guidance, decide the exact rules.
What is CLEAPSS?
CLEAPSS is an advisory service that supports practical science, design and technology, and art in UK schools and colleges. It says approximately 95% of primary and secondary schools in England, Wales and Northern Ireland are members.
How important is practical work in science?
Evidence suggests it matters when it is used purposefully. The EEF says practical work can build practical skills and scientific reasoning, and Ofsted says it should have a clear purpose, be part of a sequence and take place when pupils have enough prior knowledge.
What CO₂ level is too high in a classroom?
DfE guidance says that where CO₂ stays consistently above 1,500 ppm in an occupied room, action should be taken to improve ventilation. BB101 sets a daily average of 1,500 ppm for natural ventilation and 1,000 ppm for mechanical ventilation.
Do plants in a classroom improve air quality?
Plants make a room more pleasant and link to biology lessons, but the evidence that a few potted plants noticeably clean room air is weak. Ventilation is far more effective at removing carbon dioxide and other indoor pollutants.
What equipment should every science classroom have?
The basics are beakers, measuring cylinders, conical flasks, pipettes, thermometers, test tubes and racks, microscopes, eye protection and a first-aid kit, plus storage that is labelled and easy to reach.
How can I make science lessons more hands-on?
Use simple experiments, bring in real objects and models, ask open-ended questions, set group challenges with roles for each pupil and treat mistakes as evidence.


